Time Lapse animation created from satellite imagery can give us sight of changes in earth over a period of time.
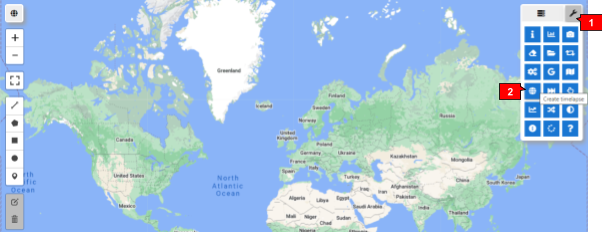
In this article, we’ll demonstrate how to create a time-lapse animation using the Heroku web app. To access the app, follow this link. When you open the app, you’ll see a window with a base map and various tools at your disposal.
1-2. To start creating your time-lapse animation, click on the ‘Create Time lapse’ option in the toolbar.
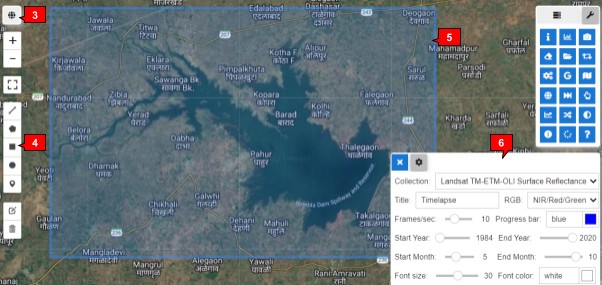
3. Then you can navigate to your Area Of Interest either by searching on the search bar in the top left corner of the screen.
4-5. Once you’ve located your area of interest, draw a rectangle around it using the drawing tools on the left side of the screen to define the area.
6. Then from the toolbar appeared on the bottom right of the screen,
- Choose a collection. Landsat TM-ETM-OLI Surface Reflectance, Sentinel-2AB Surface Reflectance and MODIS are the available collections. In this tutorial, I have selected Sentinel-2AB Surface Reflectance.
- If required, you can give it a Title. The default Title will be “Time lapse”.
- Select an appropriate band combination from the RGB dropdown menu.
- Set the desired frame rate, with a minimum of 1 and maximum of 30 frames per second (fps).
- Define the timeframe of your animation by specifying the start and end dates/years.
- Cloud masking and normalized difference index options are also accessible during creation.
- Start generating your animation by clicking the ‘Create Animation’ button.
- Your time-lapse animation should now appear on the screen.
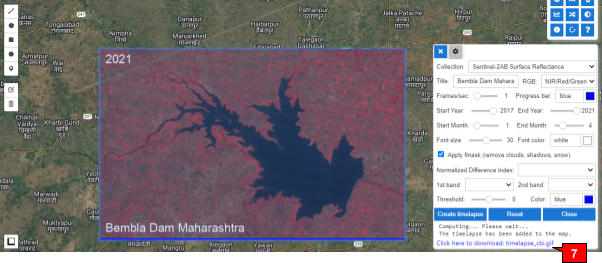
7. To save the time-lapse video, click the ‘Download Time Lapse’ link.
Some examples of time-lapse animations created using the Heroku web application are shown below. Enjoy!
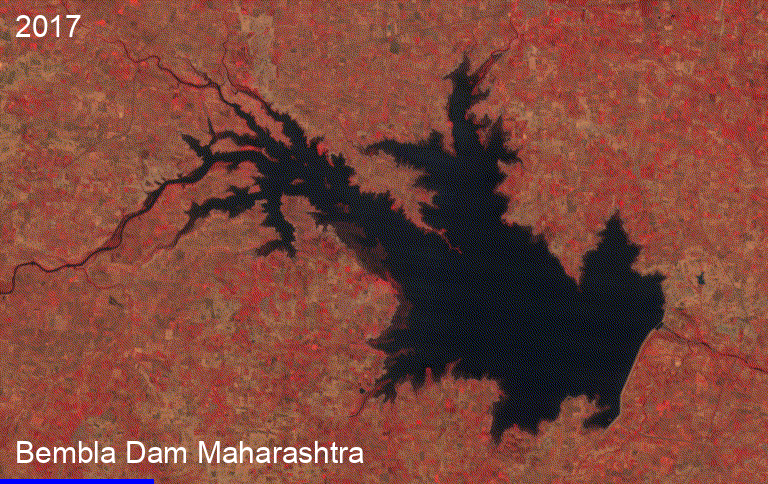
Bembla Dam- 2017-2021 generated using Sentinel-2 images
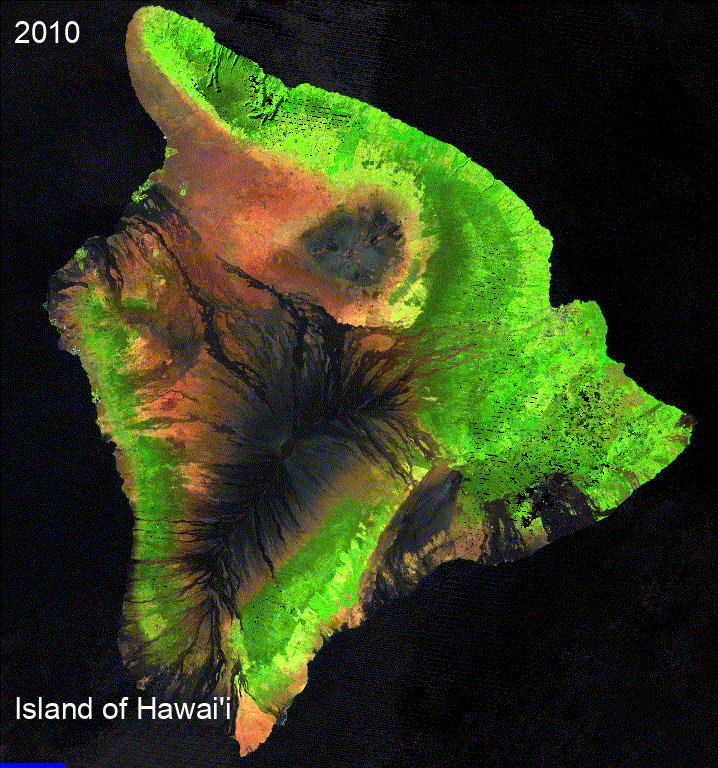
Island of Hawai’i 2010-2020 generated using Landsat Scenes
In conclusion, time-lapse animations generated from satellite imagery offer valuable insights into changes occurring on our planet over time. Using the Heroku web app, users can easily create their own time-lapses by following simple steps such as defining an area of interest, choosing a suitable collection, adjusting settings, and generating the final product. With its user-friendly interface, powerful features, and free trial version, the Heroku web app provides a convenient platform for exploring and visualizing geospatial data. Overall, time-lapse animations produced via this method represent a helpful resource for scientists, researchers, educators, and anyone interested in monitoring global phenomena.